流媒体服务器 | 使用ChatGPT API的Retrofit 2
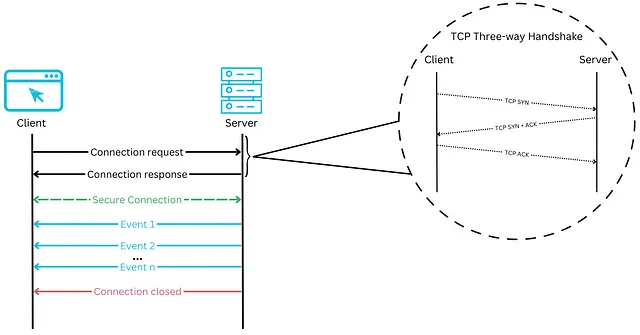
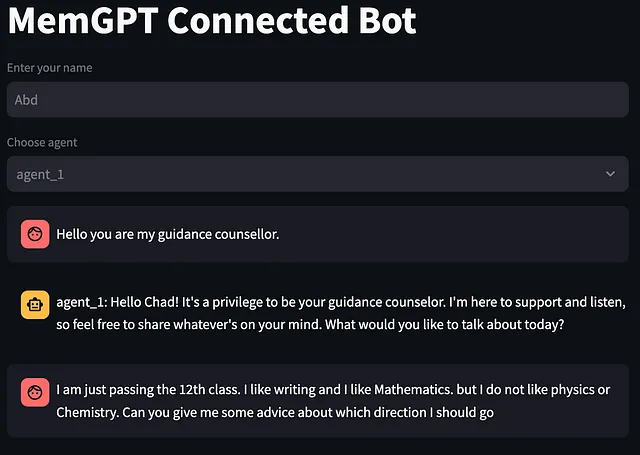
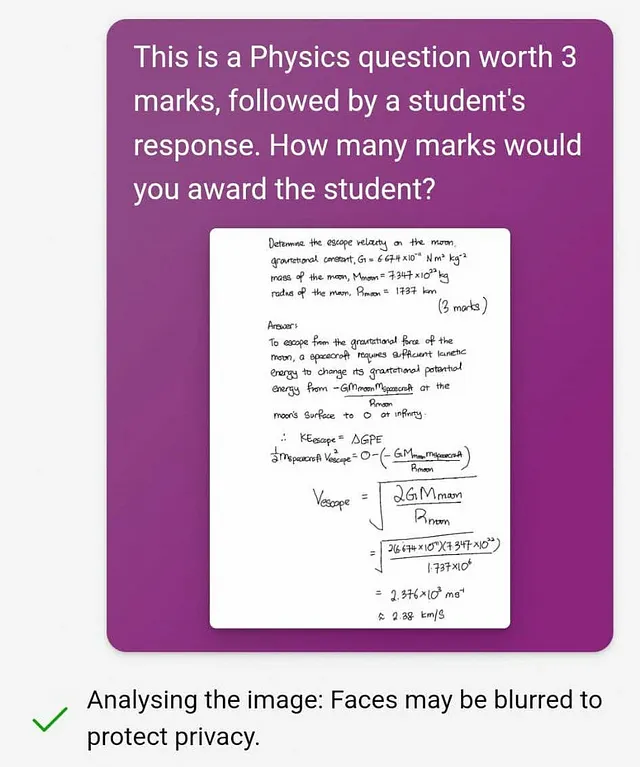
嘿开发者们,让我们从一些背景故事开始这篇博客吧。我们几乎每个人都每天在工作中使用ChatGPT来快速获取帮助。通常,我们搜索某个内容,然后以文字流的形式得到一些回应,就好像有人为我们逐字打字,这似乎既迷人又类似人类打字。最近,我在应用商店上发现了一款应用程序,它主要帮助学生解决学术问题。所以,他们只需要点击/浏览问题的图片(裁剪特定问题)或输入问题并上传/发送到应用程序上,然后就能得到问题的一些解决方案。大部分情况下,答案可能清晰或者不清晰,因为他们的后端AI直接给学生提供最少的解题步骤作答。这听起来有点繁琐,不是吗?让我们期待解决方案。如果学生能够逐步得到解决问题的步骤,并附带每个步骤的描述,那将好得多。这看起来比当前的答复状态要好多了。所以,现在我们转向技术因素。
我使用ChatGPT的聊天完成API和Retrofit @Streaming找到了一个解决方案,可以解决这个问题。那么我们开始吧。
a)在Android Studio中创建一个Android应用程序,并设置所需的依赖项,如Retrofit,Gson Converter等。不要忘记在Android清单文件中添加Internet权限。
implementation "com.squareup.retrofit2:retrofit:2.9.0"
implementation "com.squareup.retrofit2:converter-gson:2.9.0"
b)根据您的需求创建layout.xml,例如,创建一个可编辑的字段用于输入问题,两个按钮用于将问题发送到服务器并清除视图以提问新问题,以及一个用于显示答案的TextView。输入您的问题并点击发送按钮。
private fun uploadQuestionToServer(inputText: String) {

        val interceptor = HttpLoggingInterceptor()
        interceptor.setLevel(HttpLoggingInterceptor.Level.BODY)

        val gson = GsonBuilder()
            .setLenient()
            .create()

        val okHttpClient = OkHttpClient.Builder()
            .addInterceptor(OpenAiInterceptor())
            .addNetworkInterceptor(interceptor)
            .build()

        val retrofit = Retrofit.Builder()
            .baseUrl(BuildConfig.BASE_URL)
            .addConverterFactory(GsonConverterFactory.create(gson))
            .client(okHttpClient)
            .build()

        val retrofitAPI: ApiService = retrofit.create(ApiService::class.java)

        val tempList = arrayListOf<MessageBody>()
        val messageBody = MessageBody(
            role = "user",
            content = inputText
        )
        tempList.add(messageBody)

        val modal = ChatGPTRequest(messages = tempList)

        CoroutineScope(Dispatchers.IO).launch {

            val str = StringBuilder()
            getData(retrofitAPI, modal, gson).collectLatest {

                withContext(Dispatchers.Main) {
                    str.append(it.choices[0].delta?.content)
                    activityPostsBinding.textAnswer.text = str
                }
            }
        }
    }
private fun getAnswer(retrofitAPI: ApiService, modal: ChatGPTRequest, gson: Gson) = flow {

        val response = retrofitAPI.getStreams(modal).execute()

        if (response.isSuccessful) {
            if (response.isSuccessful) {
                val input = response.body()?.byteStream()?.bufferedReader() ?: throw Exception()
                try {
                    while (currentCoroutineContext().isActive) {
                        val line = input.readLine()
                        if (line != null && line.startsWith("data:")) {
                            try {
                                val answerDetailInfo = gson.fromJson(
                                    line.substring(5).trim(),
                                    ChatGPTResponse::class.java
                                )
                                emit(answerDetailInfo)
                            } catch (e: Exception) {
                                e.printStackTrace()
                            }
                        }
                        delay(100)
                    }
                } catch (e: IOException) {
                    throw Exception(e)
                } finally {
                    input.close()
                }
            } else {
                throw HttpException(response)
            }
        }
    }
在 header 中添加 ChatGPT API 密钥以验证请求,您可以从 https://platform.openai.com/api-keys 链接获取 ChatGPT API 密钥。
class OpenAiInterceptor : Interceptor {
    override fun intercept(chain: Interceptor.Chain): Response {
        val request = chain.request();
        val authenticatedRequest = request.newBuilder()
            .addHeader("Authorization", "Bearer ${BuildConfig.GPT_KEY}")
            .build();

        Log.d("headers", authenticatedRequest.headers["Authorization"]!!);
        return chain.proceed(authenticatedRequest);
    }
}
@Streaming
@POST("completions")
fun getStreams(@Body gptBody: Any?): Call<ResponseBody>
在您的应用级别的build.gradle文件中添加基础URL和API密钥。供参考-
buildConfigField 'String', 'BASE_URL', '"https://api.openai.com/v1/chat/"'
buildConfigField 'String', 'GPT_KEY', '"your-chat-gpt-api-key"'
请参考以下链接,可以查看ChatGPT的聊天/完成API参考文档:
https://platform.openai.com/docs/api-reference/chat网址中的英文文本的简体中文翻译(保持HTML结构):
暂时就这些了。请访问以下GitHub仓库查看项目:
请在评论区分享您对这篇博客的宝贵意见,以及我如何能够进一步改进。欢迎大家积极贡献于该文章库。
快乐编码 :)